Do you use Adobe Premier Pro CS5, CS6 or CC on a Macbook Pro? I am not sure which models this effects. Mine is a mid 2010 Macbook Pro 17”. Apparently it affects iMac and Macbook Pro, but I can’t say which vintages.
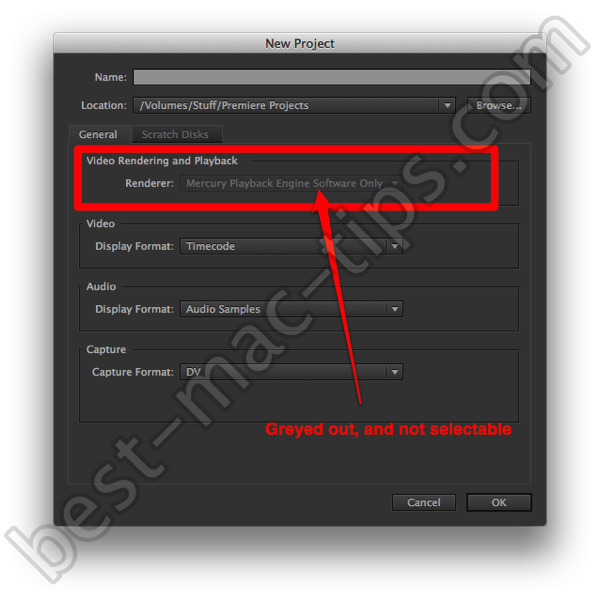
I recently updated from CS5 to CC, and lost hardware rendering support. There’s a tweak I performed a few years ago for CS5 that I’ve now repeated on CC. You’ll know when hardware rendering is locked out when you see this:

Here’s how to enable the hardware based video renderer:
Technically speaking, CUDA needs at least 768M video RAM. Older Macbook Pro computers may only have 512MB, but you can still enable CUDA. I have, and mine has 512MB.
1. You can get the latest CUDA drivers here, http://www.nvidia.com/object/mac-driver-archive.html
Download, and install them. You should be able to keep CUDA updated from within the newly installed CUDA System Preferences panel.
2. You’ll need to run an app called GPUSniffer. It’s buried deep inside the Adobe files. Assuming you have Premier installed in the default location, just past the following into Terminal:
/Applications/Adobe\ Premiere\ Pro\ CC/Adobe\ Premiere\ Pro\ CC.app/Contents/GPUSniffer.app/Contents/MacOS/GPUSniffer
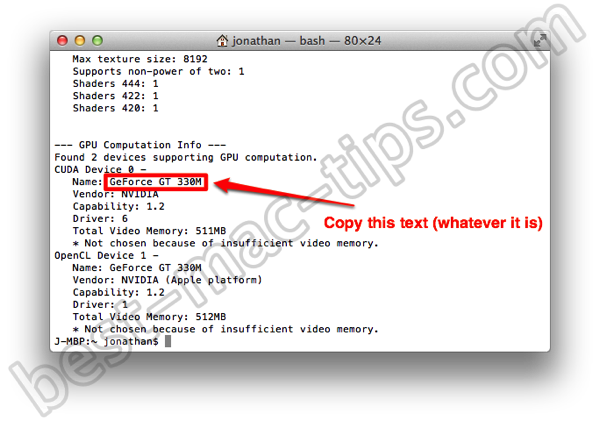
Hit Return, and it should run a text based app, which will display its results in Terminal. Something like this:

3. Now you need to paste the name of your CUDA Device into a file within the Adobe Premier Pro app. Paste the following into Terminal:
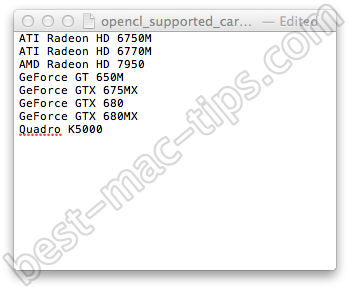
sudo open -e /Applications/Adobe\ Premiere\ Pro\ CC/Adobe\ Premiere\ Pro\ CC.app/Contents/cuda_supported_cards.txt


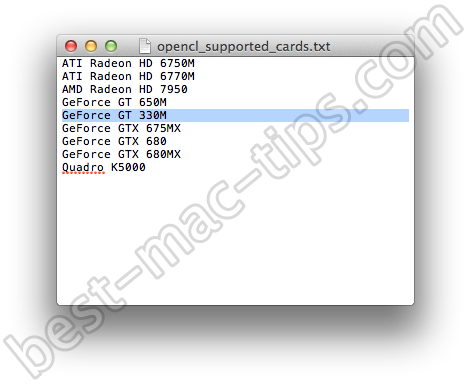
You can see I added in “GeForce GT 330M” on the fifth line from the top. You can add it to the end of the file if you like, I just put it there to be orderly.
4. You need to make the same change to a similar file within the Adobe After Effects CC app.
Just paste this into Terminal:
sudo open -e /Applications/Adobe\ After\ Effects\ CC/Adobe\ After\ Effects\ CC.app/Contents/raytracer_supported_cards.txt
/Applications/Adobe\ Premiere\ Pro\ CS6/Adobe\ Premiere\ Pro\ CS6.app/Contents/GPUSniffer.app/Contents/MacOS/GPUSniffer


