With the release of macOS Sonoma, users have noticed a new feature that appears when the caps-lock key is enabled. This feature, represented by a blue up-arrow below the cursor, has caused confusion among some users. In this article, we will explain what the blue up-arrow is and provide steps to disable it if desired.
What is the Blue Up-Arrow?
The blue up-arrow is a visual indicator introduced in macOS Sonoma to provide a clear indication when the caps-lock key is activated. When caps-lock is turned on, the blue up-arrow appears below the cursor, serving as a reminder to users that uppercase letters will be typed. Something handy about this feature is you can click the up-arrow to disable caps-lock.
Confusion and User Experience:
While the blue up-arrow is intended to be a helpful visual cue, some users have found it to be confusing or distracting. Those who are not familiar with this new feature may mistake it for a system error or an indication of another function. Additionally, users who have specific accessibility needs or prefer a more minimalistic interface may find the blue up-arrow unnecessary. Unfortunately the geniuses at Apple didn’t think it was important to provide an easy way to users to have a way to disable and enable this feature.
Disabling the Blue Up-Arrow:
If you find the blue up-arrow distracting or simply prefer not to have it displayed, you can disable this feature in macOS Sonoma, with somewhat of a hack. Here are the steps to do so:
Open Terminal: Launch the Terminal application on your Mac. You can find it by searching for “Terminal” using Spotlight or by navigating to Applications > Utilities > Terminal.
Paste the First Command: In the Terminal window, copy and paste the following two commands (first one, then the next one). Hit Enter after each:
Enter Password: Once you have pasted the first command, press the Enter key to execute it. You will be prompted for your system password. Type that in (you won’t see it typing in, so just type it in and hit Enter).
Paste the Second Command: Paste in the second command, and hit Enter. You won’t be asked for your password this time, as you already provided it the first time.
Restart Your Mac: After executing the command, restart your Mac for the changes to take effect.
By following these steps, you can disable the blue up-arrow feature in macOS Sonoma, allowing you to customize your user experience according to your preferences.
Re-enabling the Blue Up-Arrow Feature in macOS Sonoma
If you’ve previously disabled the blue up-arrow feature in macOS Sonoma and now wish to re-enable it, you can reverse the process with a simple change. Follow these steps to restore the feature:
Open Terminal: Launch the Terminal application on your Mac. You can find it by searching for “Terminal” using Spotlight or by navigating to Applications > Utilities > Terminal.
Paste the Command: In the Terminal window, copy and paste the following command. Hit Enter after pasting:
Enter Password: You will be prompted for your system password after you paste the command and press Enter. Type in your password (note that it will not be displayed for security reasons) and hit Enter to execute the command.
Restart Your Mac: Once the command has been executed, restart your Mac to apply the changes.
By completing these steps, you will have re-enabled the blue up-arrow feature in macOS Sonoma. Your user experience will return to the default setting with the feature active.
Conclusion:
The blue up-arrow below the cursor in macOS Sonoma is a new feature designed to indicate the activation of the caps-lock key. While it aims to be helpful, some users may find it confusing or prefer a more minimalistic interface. By following the provided steps, you can easily disable the blue up-arrow and tailor your macOS Sonoma experience to your liking.
The built-in clipboard in macOS is as basic as it gets. You can save one item to the clipboard, and you can paste that item. That’s it. Essentially, the macOS clipboard system hasn’t evolved beyond the original concept of a OS clipboard. In the real world, and especially for so-called computer power-users, we need something more than that. How about a clipboard that has some history to it, so that it can store tens or hundreds of items?
There are plenty of commercial (paid) clipboard managers. But here we’ll look at the best free options. In my opinion (as someone who has used clipboard managers extensively and for many years) the free options are totally adequate.
Clipy
Clipy is the clipboard manager I use on my various macOS computers. Although it’s not had a new release since 2018, it still works on the current latest version of macOS (Ventura, 13.3, as I write this). It works fine on Silicon (M1, M2) machines, and Intel machines.
It has an GitHub project here. You can install it via a prebuilt DMG package (the regular way of installing macOS apps) available here, or via HomeBrew (if you know what that is).
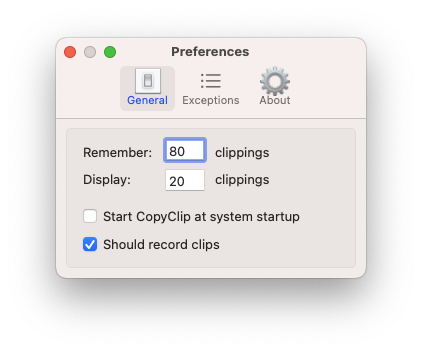
It has a great line-up of features and settings, accessible in its Preferences / Settings.
You can store hundreds of items, and organise them into folders.
CopyClip
CopyClip is available in the App Store. It’s free. It’s very basic, but does the trick. If you don’t need the extra bells and whistles in Clipy, then CopyClip is a suitable alternative. It has just a few basic Preferences / Settings.
Conclusion
For free options, those are the two I suggest checking out.
If you know of or find a better free macOS clipboard manager, let me know in the comments.
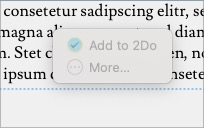
Are you trying to work with text in an app on macOS and an annoying context menu keeps popping up when you click on the text? It looks something like this:
In XD it initially looks like this:
Initial View
But if you click on the text again (left click on a mouse, or single finger tap on a trackpad — meaning, this is NOT the regular right-click/two-finger-click context menu), it will look like this:
In another fantastic app I use, called NotePlan, it would show up looking like this:
The Services Menu in Noteplan
Fortunately in NotePlan it wasn’t preventing me from editing text like it does in XD. NotePlan is one of the huge list of fantastic apps I use from my SetApp subscription. I discus SetApp here.
Recently I had to do some work in Adobe XD. I discovered this annoying macOS feature makes working with text in XD almost impossible. If you try to click on some text to place the cursor where you’d like to start editing, you’ll instead have this menu showing up.
This is apparently called the “Services Menu”. Although I think in more recent versions of macOS it should be called the “Actions menu”, since it’s different from the original Services Menu feature in macOS. It’s meant to make life on macOS easier, but unfortunately in Adobe XD it messes up the ability to edit text.
How to disable the Services Menu on macOS
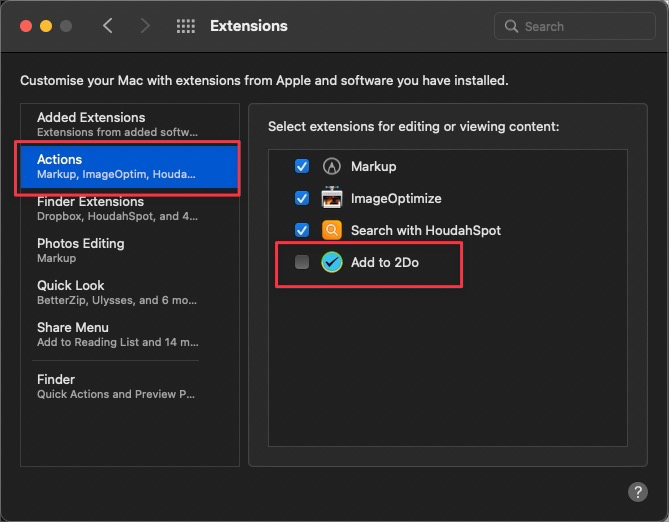
Go to System Preferences, then Extensions, then Actions. You may find more than one action in the list. You only need to disable the action that was showing up in the app you’re finding the Services Menu interferes with. in my case it was Adobe XD, and the only action showing up in there was “Add to 2Do”. So that’s the one I needed to disable. Unfortunately it does mean I’ll no longer have access to that quick action in all apps. But for now, I know of no other way around this problem. If you know of one, let me know in the comments.
Disable the Actions that were showing up in the Services Menu
That’s it. Once you’ve disabled the Actions that were showing up in the instance of the Services Menu you were troubled by, it should stop showing up.
Need a Bluetooth 5.0 adapter for an older Mac (one that doesn’t already support BT5)? Or looking for a long range bluetooth 5 adapter? Look no further. On this page I’ve listed all those on Amazon.com that are known to work on Mac.
It’s not uncommon for the internal Bluetooth on MacBooks (and even Mac desktops) to have issues. Sometimes this occurs after the computer comes out of sleep, or when connecting/disconnecting a Bluetooth device. It can also occur when you have numerous USB devices plugged in. My 2010 MacBookPro periodically loses Bluetooth entirely. Hovering the mouse over the Bluetooth icon in the menu bar will say, “Bluetooth: Not Available”. The Bluetooth options icon completely vanishes from System Preferences. So there’s no way to try turning it off and on. I’ve written a few articles on ways to try and fix these issues. But in many cases it might be a better option to just install a new Bluetooth adapter.
If your Mac currently only supports Bluetooth 2.0 or 3.0, the added bonus is you’ll get upgraded to Bluetooth 4 or Bluetooth 5. Both are more reliable, more energy efficient, has better range, and various other benefits.
Longer Range? Like, up to ~100 ft / ~30 m … If you want a long range bluetooth connection, the first adapter in my list below may suit your needs perfectly.
Currently I only know of “Audio only” Bluetooth 5 adapters that work on macOS. This means they only support streaming audio. For many people that’s all the want to do with Bluetooth anyway. If that’s you, then the following options are those I recommend.
Best Mac Tips recommends this adapter if you specifically want long range coverage. Otherwise, or for a less expensive option, try the Avantree DG80 or C81 below.
Avantree DG60 Long Range Bluetooth 5.0 USB Audio Adapter for PC Laptop Mac PS4 PS5 Linux, Superior Sound Wireless Audio Dongle for Headphones Speakers, aptX Low Latency, Plug and Play (Audio ONLY)
The Avantree DG60 Long Range Bluetooth 5.0 USB Audio Adapter is one of the few that are MacOS compatible. Avantree doesn’t state on Amazon, or anywhere I could find on their website, specifically which version of macOS it supports. They do state, it is compatible with, “ANY Laptop / Computer with USB Audio Output.” and that it supports “Mac OS”.
“The DG60 can reach a range of up to 164ft (50m) in open line-of-sight conditions and up to 50-70 ft (15 – 21m) indoors.”, so this is a long range Bluetooth adapter. So that’s an added bonus if you want to stream audio from your Mac to headphones or speakers that are an exceptionally long distance from your computer. Keep in mind, it’s a HUGE adapter, with an antenna. So don’t buy it if you’re looking for something compact.
According to the Avantree website, it has 2 year warranty.
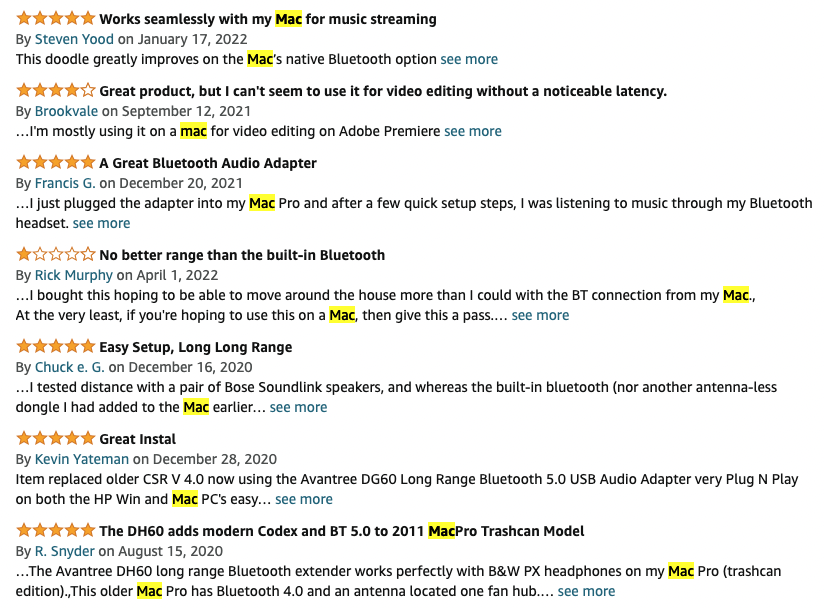
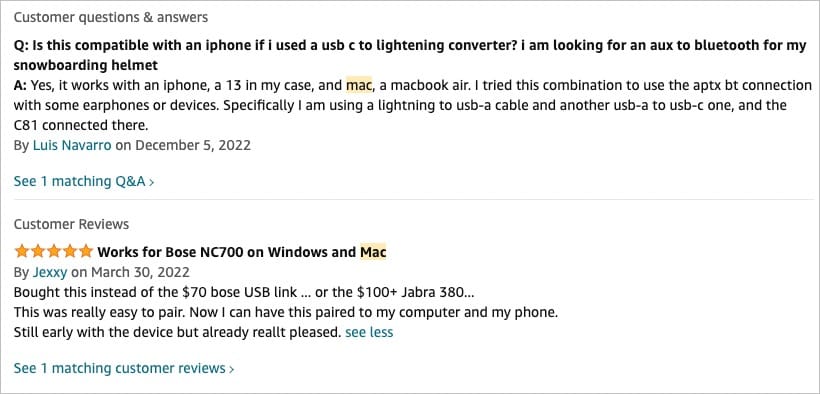
I see numerous reviews from people saying it works on their Mac. I didn’t find any reviews of people complaining it does not work on Mac. See screenshot below:
Reviews showing it works on macOS.
Best Mac Tips recommends this adapter for Macs. If want USB-C support and / or a microphone, see the C81 model below.
Avantree DG80 USB Bluetooth Audio Adapter for Connecting Headphones to PS5, PS4, Switch, PC. Wireless Audio Dongle with aptX Low Latency Support, No Driver Installation
This is another Mac compatible option from Avantree. The Avantree DG80 USB Bluetooth Audio Adapter is another option I’ve discovered for you which indicates it is macOS compatible.
Avantree doesn’t state on Amazon, or anywhere I could find on their website, specifically which version of macOS it supports. They do state, it is compatible with, “ANY Laptop / Computer with USB Audio Output.” and that it supports “Mac OS”.
According to the Avantree website, it has 2 year warranty.
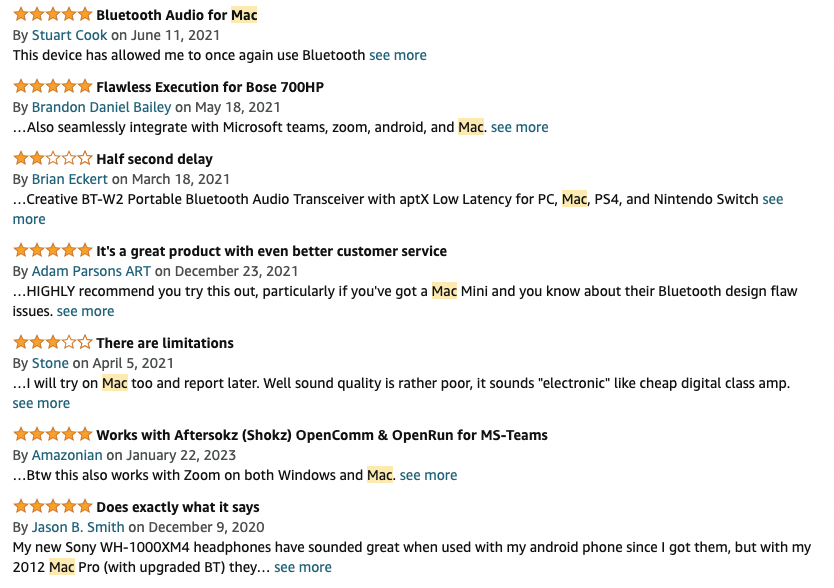
There’s plenty of reviewers stating it works on their Mac. See screenshot below.
Reviews on Amazon from confirming it works on macOS.
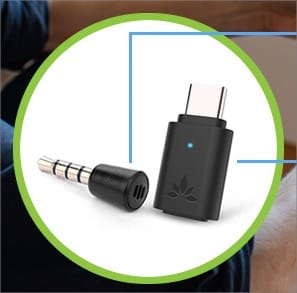
Avantree C81 USB-C Bluetooth Audio Adapter for PS5 – Connect Headphones Wirelessly with aptX Low Latency Support and Included Mini Mic
This Avantree C81 USB-C Bluetooth Audio Adapter has almost identical features to the DG80 above, except that it includes a microphone. Also, even though this is a USB-C adapter, a converter cable is included to enable devices with just a USB-A port. Native USB-C support means it will also work on iOS devices with a USB-C port.
Bluetooth adapter AND a microphone
Multiple Headphones? It also supports pairing two pair of headphones. See below:
Best Mac Tips recommends this adapter if you want native USB-C support and / or need the microphone it comes with. Otherwise, get the DG80 above.
Confirmation the C81 works on macOS and iPhones (with USB-C port)
One of the biggest concerns for Mac users is compatibility with external storage devices. In recent years most Mac computers don’t have upgradable internal storage. With the need for more and more storage space, choosing the right external storage solution for your Mac is important. MacOS is known for its strict hardware compatibility standards, which can make it difficult for users to choose the right storage device. In this article, we will look at the three most popular topics related to external storage compatibility with MacOS.
1. Types of External Storage Devices Compatible with MacOS
When it comes to external storage devices, there are many options available for Mac users. These include external hard drives, solid-state drives (SSDs), and flash drives. Each type of device offers its own unique advantages and disadvantages, so it is important to understand your storage needs and what type of device will best suit those needs.
External hard drives are the most common type of external storage device and they offer large storage capacities at an affordable price. However, they are slower than SSDs and can be more susceptible to physical damage.
Solid-state drives (SSDs) are more expensive than external hard drives, but they offer faster data transfer speeds and are more durable. They are also more energy-efficient, making them a great option for laptop users.
Flash drives are small and portable, making them a great option for users who need to store data on the go. They are also more durable than external hard drives, as they have no moving parts. However, they have smaller storage capacities and are more expensive per gigabyte than external hard drives.
2. File System Compatibility
When choosing an external storage device for your Mac, it is important to consider the file system compatibility. MacOS supports several different file systems, including HFS+, APFS, and exFAT. HFS+ is the file system used by most Macs, while APFS is a newer file system that is optimized for solid-state drives. exFAT is a file system that is compatible with both Macs and Windows computers. Practically speaking, pretty much any external drive can be formatted according to the needs of your Mac. So there’s nothing to worry about here.
If you are only using your external drive on a Mac, it is best to choose a device that is formatted with either HFS+ or APFS. If you need to share data between a Mac and a Windows computer, then exFAT is the best option. Again, you can use MacOS to format the drive to the filesystem best suited to your needs.
3. Connection Types
Finally, it is important to consider the connection type when choosing an external storage device for your Mac. There are several different connection types available, including USB, Thunderbolt, and Firewire.
USB Connections
USB is the most common connection type and is compatible with almost all Macs. Traditionally USB provided slow data transfer speeds, but it is an affordable and reliable option for most users. These days newer versions of USB (USB 3, 3.1, and 3.2)
Specification
Signaling Rate/Lane
Number of Lanes
Aggregate Bandwidth
USB 3.2 Gen 1×1
5 Gbps (SuperSpeed)
1
5 Gbps
USB 3.2 Gen 2×1
10 Gbps (SuperSpeed+)
1
10 Gbps
USB 3.2 Gen 1×2
5 Gbps (SuperSpeed)
2
10 Gbps
USB 3.2 Gen 2×2
10 Gbps (SuperSpeed+)
2
20 Gbps
Thunderbolt is a high-speed connection type that is available on some Macs. It provides faster data transfer speeds than USB, making it a great option for users who need to transfer large files quickly.
Firewire is a legacy connection type that is still used by some older Macs. It provides faster data transfer speeds than USB, but it is not as commonly used as Thunderbolt.
My Recommendation
For most users, with a relatively new Mac, an external SSD with a USB-C connector will be your best bet. So long as your Mac has USB-C ports. Although, you can also get hubs and adapters to go from a USB-A port to one or more USB-C ports. But keep in mind, it’s unlikely USB-A ports will take advantage of the speed capabilities of a modern USB-C (3.2) drive. If you think there’s a chance you’ll be using your drive on a newer Mac (either a future replacement to your current Mac, or another Mac you might use) then you’ll be glad to have a faster more modern USB-C (3.2+) drive. I’ll list a few at the end of this article.
Conclusion
In conclusion, external storage is an important aspect of modern computing and macOS provides seamless compatibility with various external storage options. While traditional options like hard disk drives (HDD) and solid-state drives (SSD) are still popular, new technologies like the Thunderbolt 3 and NVMe interfaces offer faster data transfer speeds and better performance. Additionally, the ability to use external storage for Time Machine backups and as a bootable volume allows users to easily expand their storage and protect their data.
When choosing an external storage solution for your Mac, it is important to consider your needs, such as the amount of storage space required and the desired performance. It is also crucial to ensure that the storage solution you choose is compatible with your Mac’s hardware, especially if you are using an older model. With so many options available, there is sure to be an external storage solution that meets your needs and enhances your Mac experience.
PORTABLE STORAGE ON THE GO: The light, pocket-sized Portable SSD T7 delivers fast speeds with easy and reliable data storage for transferring large files, including crucial business documents, games, or movies TRANSFER IN A FLASH: Transfer massive files with the incredible speed of USB 3.2 Gen 2; PCIe NVMe technology delivers blazing fast sequentia… read more
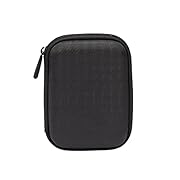
Max compatible dimensions (outside): 5.8 x 4.2 x 1.2 inches Compact case to store or transport medium and larger portable hard drives Slim line design allows case to easily fit into any backpack or briefcase Interior strap and zippered closure secures portable hard drive in place Internal mesh pocket conveniently stores power cords Drive case insid… read more
COMPATIBLE & SIZE – Fit Western Digital WD Elements | WD My Passport | WD My Passport Ultr | Toshiba Canvio Basics | Seagate Portable External Hard Drive | Portable External Hard Drive HDD 1TB 2TB 3TB 4TB 5TB USB 3.0. Exterior size: 5.6 x 4.4 x 1.5 inchs & Interior size: 4.8 x 3.5 x 1.0 inchs. WATER RESISTANT – Made of waterproof PU Material, which… read more
【COMPATIBLITY】 Fits Seagate Portable External Hard Drive / Seagate One Touch HDD / Seagate Ultra Touch HDD / Seagate Backup Plus Slim / Seagate Expansion / Western Digital WD Elements / WD My passport / Toshiba Canvio Basics Portable External Hard Drive HDD 1TB 2TB 4TB 5TB USB 3.0. Exterior size: 5.6 x 4.4 x 1.5 inch & Interior size: 4.8 x 3.5 x 1…. read more
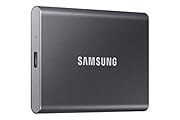
Superfast read write speeds: SSD with V-NAND offers ultra-fast data transfer speeds of up to 540MB s (up to 4.9x faster than external HDDs); Ideal for transferring large-sized data including 4K videos, high-resolution photos, games and more Compact and portable design: Top to bottom shock resistant metal design fits in the palm of your hand and eas… read more
High-speed transfers with up to 550MB/s read speeds let you move hi-res photos and videos faster (Based on internal testing; performance may be lower depending on drive capacity, host device, OS and application.) Ruggedized, water- and dust-resistant (IP55-rated) (IEC 60529 IP55: Tested to withstand water flow (30 kPa) at 3 Minch; limited dust cont… read more
Read speeds up to 3,500 MB/s² (500GB – 2TB¹ models) Remarkable reliability features to help protect your content Downloadable Western Digital SSD Dashboard** helps you monitor your drive’s health | **Available for download at Official Western Digital Website Slim M.2 2280 form factor, compatible with PCIe Save on space with a single-sided M.2 2280 … read more
Recently I installed a a trial of Sibelius from Avid Software. Since then an Avid software management application (called Avid Link) automatically loads every time I start my computer.
Avid Link provides no option for disabling this obnoxious feature. What’s more, the app doesn’t show up in the list of macOS Login Items list (found in System Preferences, under Users & Groups), so it can’t be disabled there either. The genius morons (to put it politely) at Avid have decided on our behalf that anyone using any of their applications must always have their licensing, update, messaging, etc., application running on their computer. Wankers.
I see online that people have been complaining about this for years. Previously the application was called Avid Tools. That too would launch automatically, and that too invoked complaints, and people trying to figure out how to disable it.
There’s a simple solution. You’ll need to open Terminal.app and execute the following command:
You’ll be prompted for your macOS user password. Enter that, and hit enter. That’s it. Done deal.
What this command does is modify the file /Library/LaunchAgents/com.avid.avidlink.plist such that the RunAtLoad variable is set to false. This, in effect, tells macOS to not launch Avid Link at system start-up.
Problem solved.
Let me know if the comments below if this works for you, or not.
Having the following experience? When typing search terms into the Safari (desktop) address bar, hitting Return/Enter, expecting a search result page … and yet nothing happens? You’ll also note that no search suggestions are automatically popping up below the search bar.
Normally the address bar in Safari doubles up as a search bar. Type in whatever you like, hit Return, and your nominated search engine will load with the results. If enabled, you’ll also see suggested results showing up as you type. Recently, I found this all stopped working. Which meant the only way I could search via Safari was to first browse to the search engine I want to use (https://ecosia.org in my case).
The Quick Fix (for some)
The solution may be a quick fix. Try disabling the “Include search engine suggestions” option. This will also (automatically) disable the “Include Safari suggestions” option (if it was enabled). Close the Safari Preferences. Test the search bar again. Just type in “test” or whatever you like, and hit the Enter/Return key on your keyboard. Search results will hopefully display.
I found I was able to re-enable the “Include search engine suggestions” (and “Include Safari suggestions”), and it continued to work as expected.
Has this happened to you? Out of the blue, using Quicklook (normally with spacebar in Finder, for example) no longer displays correctly. Images show up as a small thumbnail with a thick white border. Many other files just show up with a place holder. Video files no longer play in Quicklook.
It ends up looking like this:
Image Credit: http://techzle.com/
Surely Apple hasn’t killed the wonderful Quicklook feature?
Well, no they haven’t. It’s a bug (seemingly. And the fix is easy … and, ironically, to fix it, you need to kill the Quicklook feature. But only momentarily.
Solution to broken Quicklook in Monterey
For most people the solution is apparently very simple.
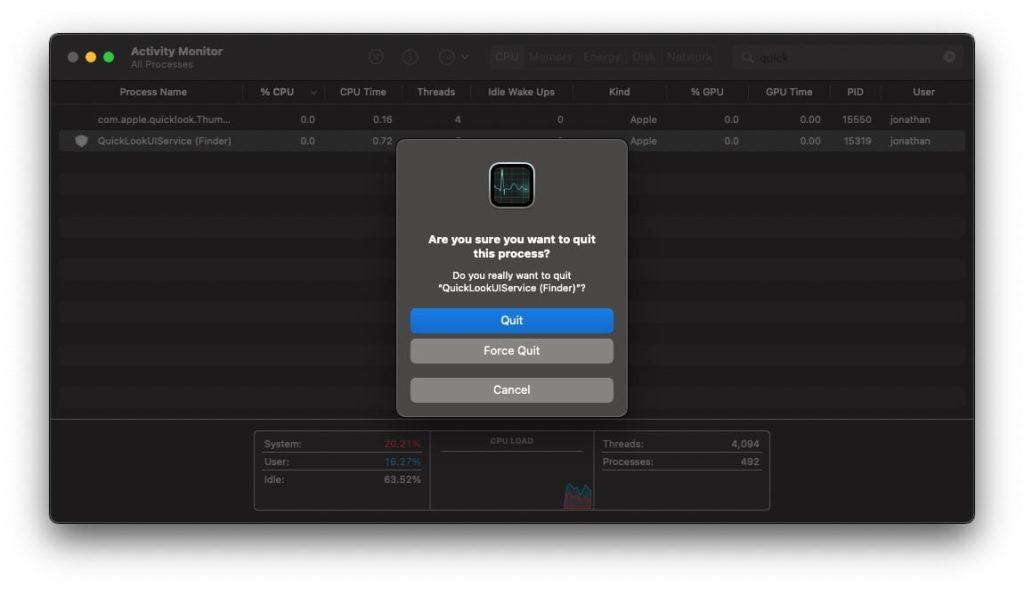
1) Open Activity Monitor (if you don’t know what that is, hit CMD-Space to bring up Spotlight search, type “Activity” into the Spotlight search, and select the Activity Monitor app that will be showing at the top of the search results.
Search for QuickLookUIService (Finder)
2) In Activity Monitor, search for “Quick”. You should see an entry come up named “QuickLookUIService (Finder)”
Select that entry. Then click the X icon and select Force Quit.
Force Quit the application
Hopefully that’s done the trick.
Return to Finder and hit spacebar on an image, or video, etc. It should now show up in the fully functional Quicklook you are used to.
Recently I’ve had a bout of the Music app randomly launching (“opening”) itself. It seems to just randomly pop up on its own accord. Looking online, I see this has been a problem for years—originally with the iTunes app, and now with its successor, the Music app.
For many people it’s Bluetooth audio devices (e.g., Bluetooth headphones, Apple iPods, etc.) causing the problem. In my case, I have no Bluetooth headphones. Yet for some of us, it’s a total mystery as to why Music app is launching. It can be rather bothersome, especially when it keeps happening every few minutes.
In forums and articles elsewhere, I see people suggesting all kinds of creative solutions. But I found that ultimately the best (simplest, and most reliable) solution is to use a small app called Notunes. I think it’s ridiculous people need to resort to such measures on a premium priced device such as an Apple computer. The developers at Apple need to wake up and listen to the music (pun intended), and add a simple preference option in the Music app allowing the user to disable auto-launching.
The Solution
You can get Notunes here, on Github.
If you use Homebrew (which I highly recommend, and provide instructions on here), it’s super easy to install. Just use this command:
brew install --cask notunes
If you don’t use Homebrew, you can download a Zip with the app here.
Problem solved. You’ll now have an icon in the top macOS menu bar that allows you to toggle on and off, whether or not you want iTunes or Music to launch on their own.
Chromium based browsers such as Google Chrome and Brave Browser require the user to confirm whether they want to allow a URI to open an external application, such as Skype, Zoom, DevonThink, the Apple App Store app, etc.
The prompt looks like this:
An example of the external application prompt
It has an “Always allow” checkbox, which works fine with for applications like Zoom, since it’s always the same URI domain that will be trying to open Zoom (it’s the URI you click on for a meeting link). But other applications like DevonThink, the application is launched when you click on the icon for the DevonThink browser extension, and the URI active in the browser at that moment could be absolutely anything. Once DevonThink launches it will take a copy of the current webpage, PDF document, etc. So any third party application (Zotero, for example) that you launch manually in order to do something with the current URI is going to have this same issue.
The issue being, it’s useless trying to whitelist the current URI.
Here’s the solution for DevonThink and for Zoom. It utilises a Chrome policy, which is easily modified via the macOS command line. You can apply this solution for any other application, so long as you can figure out what its application handler is, and its com file name.
UPDATE: Since October 2020 (when version 86 of Chrome was rolled out) it’s been possible to use either URLWhitelist (info here), or URLAllowlist (info here). But as of Chrome version 100 and above, onlyURLAllowlist works. Note that URLWhitelist will work for older version of Chrome, from versions 15 to 100; and, URLAllowList will work on version 86 and above. If you have a version of Chrome older than v86, please adjust the command accordingly (use URLWhitelist).
For Google Chrome (< version 100):
defaults write com.google.Chrome URLAllowlist -array-add 'x-devonthink://*'
defaults write com.google.Chrome URLAllowlist -array-add 'zoommtg://*'

// or you can add multiple in one command ... e.g.

defaults write com.google.Chrome URLAllowlist -array-add 'x-devonthink://*' 'zoommtg://*' 'anotherprotocol://*'
For Brave Browser:
defaults write com.brave.Browser URLAllowlist -array-add 'x-devonthink://*'
defaults write com.brave.Browser URLAllowlist -array-add 'zoommtg://*'

// or you can add multiple in one command ... e.g.

defaults write com.brave.Browser URLAllowlist -array-add 'x-devonthink://*' 'zoommtg://*' 'anotherprotocol://*'
Mozilla Firefox doesn’t currently have this issue. When you try to open a new (unregistered) external application for the first time, it will simply prompt for which application you want to open the particular protocol. You then select to always use that application. It is not specific to the domain in the URI at the time.
Is this doesn’t work for you, or even if it does work, please leave a comment below, and we’ll try to sort it out.


 context menu")